Stretching, cross and strength training is a good start to taking care of your joints. But it's not where you should stop.
Mobility exercises will not only help your joints, but improve overall health and performance. Plus, they don't take much time to complete. These exercises are different from your stretching routine and will help your joints move throughout their full range of motion, as opposed to flexibility, which is about muscle length.
Try this exercise routine to counterbalance stiff joints, which can predispose you to mobility deficiencies and lead to injury.
Drill No. 1: Ankle
1 of 15
Why do it: Lack of mobility in the ankle can lead to knee pain.
The exercise: Position yourself in front of a wall with one foot forward as shown. Rock back and forth, bringing your knee to the wall paying close attention not to lift the heel that you're mobilizing.
Drill No. 1: Ankle Continued
2 of 15
If you find that your heel is coming up, move your foot closer to the wall. This is not a stretch, so focus on smooth back-and-forth movements. Perform 10 repetitions on each side.
Tips: You'll probably notice that one side is more restrictive than the other, particularly if you've had past ankle injuries. Your goal is symmetry.
Drill No. 2: Thoracic Spine
3 of 15
Why do it: Lack of thoracic-spine mobility can cause neck, shoulder or lower back pain. By improving your mobility, you will allow for better positioning on the bike and improve breathing.
The exercise: Get two tennis balls and tape them together as shown.
Drill No. 2: Thoracic Spine Continued
4 of 15
Lie down on the floor and place the tennis balls at the base of your thoracic vertebrae so that your spine is in between the two balls.
An easy way to find this starting position is to place your hand on the bottom of your rib cage and trace a line around to your back
Drill No. 2: Thoracic Spine Continued
5 of 15
Bend your knees and perform five mini-crunches with your hands up at a 45-degree angle. Place your head back on the floor following each repetition. Slide down a couple of inches (the ball will move up) and complete five more crunches. Continue to slide and complete crunches until the ball is in between your shoulder blades.
Drill No. 2: Thoracic Spine Continued
6 of 15
Tips: Stay away from your lumbar spine (low back) and cervical spine (neck area). These areas of your spine don't need mobility work (see reference picture).
Drill No. 3: Shoulder
7 of 15
Why do it: Long hours on the bike and activities of daily living can create bad posture, such as rounded shoulders and inactive muscle function in the lower traps and rhomboids.
The exercise: Place your feet about one foot in front of a wall. Lean back and make sure your hips, upper back and head are in contact with the wall. Reach up as high as you can and slide your arms down the wall.
Drill No. 3: Shoulder Continued
8 of 15
As you slide your arms down, make sure your elbows and hands (along with your hips, upper back and head) stay in contact with the wall. Go down as far as your flexibility will allow. Return to the starting position, keeping slight pressure on the wall as you slide up and down. Perform 10 repetitions.
Drill No. 4: 3-Way Hip
9 of 15
Why do it: Lack of hip mobility can cause low back pain and limit your force production on the bike.
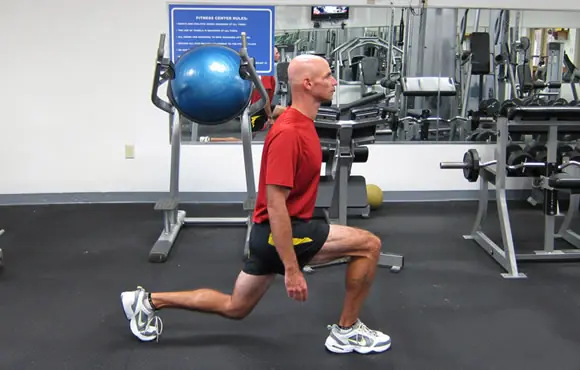
This drill consists of three movements: split squats, lateral squats and transverse squats. You might have done split squats before as part of a resistance-training program. These exercises are exactly the same.
The exercise: Start by standing with one foot forward and one foot back, as shown.
Drill No. 4: 3-Way Hip Continued
10 of 15
Drop into a split-squat position and make sure the knee of your lead leg stays behind your toes. Perform five repetitions for each leg.
Drill No. 4: 3-Way Hip Continued
11 of 15
For the lateral squat, place your feet slightly wider than shoulder-width apart. Don't spread them too far—it'll actually make the movement easier. You can use a 3-foot foam roll as a guide for your foot placement.
Drill No. 4: 3-Way Hip Continued
12 of 15
Shift your weight to one side and drop your hips down and back. Pause for a second or two, return to the starting position, and repeat on the opposite side. Perform 5 repetitions on each side.
Drill No. 4: 3-Way Hip Continued
13 of 15
For the transverse squat, stand with your left foot pointing straight ahead and your right foot at the three o'clock position.
Drill No. 4: 3-Way Hip Continued
14 of 15
Squat down and back as shown. Don't force the range of motion—it'll come with time. Pause for a second or two and return to the starting position. Perform 5 repetitions on each side.
Doing these drills daily will help you to improve your mobility as you ramp up your training during the cycling season. The exercises will only take a couple of minutes to complete and the overall health of your joints will be the beneficiary.


Discuss This Article